Thursday 30 October 2014

BHINDI NARCOL


After the festive season is over, for the next few days it feels like surviving on the humble dishes of lentils and vegetables. The festive menus take too much of toll on our stomach. Every year it is the same story. In a way its good, we get to feed in more vitamins than usual in form of veggies. We all know eating a diet rich in vegetables and fruits as part of an overall healthy diet may reduce the risk of a number of life threatening diseases. Moreover, most vegetables are naturally low in fat and calories. They are important source of many nutrients, including potassium, dietary fibre, folate, vitamins A and C. All these helps in the overall improvement of our immune system. Whenever I cook vegetables, I try to keep it simple with minimal use of spices to retain the maximum nutrient value. So everyday at least one vegetable should be there in the family menu card. When the stomach revolts, off course it takes the lead keeping behind non-vegetarian items for few days.


Moreover, my vegetarian friends are in a mission to stop visiting my blog. So, before they take such a drastic action, let me come up with few veggie recipes to my rescue. "Some" of my very much loved ones are vegetarians or almost towards it! I thought lets do them some honour. This very simple and easy recipe with Bhindi / Lady's Finger, Onion and Shredded Coconut goes very well with Indian / South Asian Breads or can be had with rice and lentil too. Its prepared  with  less spices. Let us prepare Bhindi Narcol together within an hour or so.


INGREDIENTS :

Lady's Finger : 200 gm
Onion : 1 big
Shredded Coconut : 1 medium cup
Cumin Powder : 1/2 tsp
Coriander Powder : 1/2 tsp
Punjabi Garam Masala Powder :1/4 tsp
Salt : As per taste
Turmeric : 1/4 tsp
Nigella Seeds : 2 pinches
Green Chillies : 2
Dry Red Chilli : 1
Oil : 2 tbsp

METHOD :

Wash and wipe each lady's finger with a piece of dry cloth. Cut the root end. Marinate with salt and turmeric. Keep aside for 10 minutes. Cut the onions into cubes.

Heat oil in a wok. Temper with nigella seeds and dry red chillies. Add the onion pieces. Saute till translucent. Add the the shredded coconut. Saute for two minutes.

As it releases moisture, add the ladyfingers. Slit the green chillies and add. Add the cumin and coriander powders, salt and turmeric. Saute well and cover. Reduce heat from medium to low.

After 2 minutes, open the cover and give a stir, add one small cup of water. This way cook for another 10 minutes, stirring every 2 minutes. Add the garam masala powder 2-3 minutes before switching off. Stir well.

When you add the okra / bhindi, add a pinch of baking powder which will help retain its colour!

Enjoy with rice or roti!!


Tuesday 28 October 2014

VEGETABLE CUTLET


As a child I was not so fond of vegetables, and I remember how my mother struggled each day to feed me a portion of it. Morning till night she would try to brainwash me with at least 10 advantages of having vegetables every day. She would even entice me to have them by offering double portion of fish and meat. Perhaps God watched everything up there , so today I do the same struggle with my son. God, he is so fussy about having vegetables, at times it gets on my nerves. But can a mother lose patience?.....no way....she would always want to give the proper nutrition to her kids, by hook or by crook.
     In the process of making the food tastier , may be little of nutritional value is lost, but at least some degree of nutrition is going inside, that is the whole idea. These days there are so many ways of preparing tasty food without compromising with the health of your dear ones. There are grill options, air friers to keep mummies keep smiling. I think I badly need an air frier and have such a valid reason to get a nod from the high command, hahaha.
    When my son was young, his doctor used to say try to prepare tasty food for your kid, just like you, kids too have taste buds. You cannot make porridge for them at every meal and complain doctor, my child is not eating anything. He would say prepare your kids food at home and make sure you maintain proper hygiene . I followed his saying blindly till date and try to bring colors and variety in his lunch box. Whenever I think one day he has to leave mamma to explore the bigger world, I feel the urge to be more particular about the food he eats.
   These vegetable cutlets are  excellent as evening snacks. Goes too well with tea. They can as well be eaten as a starter. They require very little ingredients to prepare, hence hassle free.

INGREDIENTS :
Potato : 2 big
Beet Root : 1 medium
Carrot : 2 medium
Green Peas : 50 gm
Roasted Peanuts : 2 tbsp
Green Chilli : 2
Dry Red Chilli : 2
Cumin Seed :  1 tsp
Coriander Seed : 1tsp
Green Cardamom : 3
Cinnamon : 1inch
Sugar : 1tsp
Salt : As per taste
Refined Flour : 3 tbsp
Bread Crumb or Semolina : 100 gm
Oil : 150 ml to deep fry

METHOD :
Peel, wash and cut potato, beetroot, carrot into halves. Boil the potatoes and carrot and beetroot separately. Let cool.

Dry roast the dry red chillies, coriander and cumin seeds, cinnamon and green cardamoms till they release aroma. Cool and dry grind them.

Drain the water from the boiled vegetables and mix together adding the salt. Heat 2 tablespoon oil in a pan. Add 2 pinches of cumin seeds. As they splutter, add the green peas and roasted peanuts.  Chop the green chillies and add. Fry for 2 minutes at low heat.

Now add the vegetable mix. Stir for 2-3 minutes. Put in 3 tbsp refined flour, sugar and the dry roasted spice mix and stir very well. Add salt if only required. Switch off, let it cool. Transfer to a bowl.

Shape into medium sized round balls and flatten with your palms. In a plate put in the bread crumb or semolina. Dust each cutlet very well with it. Once all cutlets are ready, deep fry them in batches in heated oil at medium to low heat. Drain the excess oil in tissue papers.

Serve hot with your favourite chutney and onion rings ! The smile you get in return is priceless....whether its your guests or family!!


Monday 27 October 2014

SINGAPORE FISH HEAD CURRY


Since I belong to a place or community who dream, eat, love fish just like cats, the first thing that caught my attention in this island was its love for fish prepared in a variety of sauces. Since at restaurants you are not allowed to enter the kitchen, whenever I visit a food court here, I love standing and watching with what expertise they cook in such big woks. I was particularly hooked to fish head curry for two reasons...... the enticing colour of its curry and perhaps  may be recipes with fish head is very common at our place. I love and learnt to eat fish head  alone ever since I was 6. In spite of the fact that the senior at home pulls my leg saying "you are still not satisfied eating mine that you need fish heads". They are a must on my plate. Singapore fish head curry is quite different than that of us. It was a must do as I love variety in my food, whether its at home or for the guests.


WIKI says fish head curry was first sold in a small shop in Mt.Sophia. It was a brainchild of an Indian, M.J. Gomez who suited it to the local taste. It got extremely popular among the Chinese and Malays. The spices used in this dish is heavily influenced by the South Indian fish curry. Though I feel the recipe has been modified to suit the taste buds of variety of people staying here. If ever you visit Singapore, You must visit the restaurants in and around Tekka Market or those along the Race Course Road to have a taste of authentic fish head curry. You have innumerable food courts preparing it maintaining all hygiene. The Chinese restaurants do offer this dish. If  you wish to have it sitting in a cosy, homely atmosphere, visit my kitchen, once you enter the door, you can feel the warmth, we assure that.

Exploring through various recipes, I zeroed in on this particular recipe. You can use the same curry for preparing fish, egg or chicken.


INGREDIENTS :

Fish Head : 1 or 2 big[each cut into halves, I used Salmon head]
Lady's Finger : 4-5
Egg Plant : 2 [small variety]
Tomato : 2 medium
Cumin Seeds : 1 tsp
Mustard Seeds : 1tsp
Fenugreek Seeds : 1/2 tsp
Coriander Seeds : 1 tsp
Chilli Powder : 1 tsp
Ginger : 3 inches chopped
Garlic : 5 cloves
Cinnamon Stick : 2 inches
Onion : 1big
Green Chillies: 2-3
Coconut Milk : 100 ml
Curry Leaves : 10 -12
Salt : As per taste
Turmeric :1 tsp.
Tamarind Pulp : 1/2 small tea cup 
Oil : 3 tbsp


PROCEDURE :

Clean and thoroughly wash the fish heads and marinate with little salt and sugar for half an hour. Soak the tamarind pulp in a small cup of water.

Wash and cut the ends of the lady's fingers. Wash, cut off the ends of the eggplants and then cut into halves. Rub little salt in them.

Dry roast the cumin, coriander, fenugreek, mustard, 5-6 curry leaves, garlic, ginger, cinnamon together for 2-3 minutes. Now put all the dry roasted spices in a blender and turn into a smooth paste using water as required.

Peel, wash and slice the onions. Wash and cut each tomato into 4 pieces and deseed. Cut the big green chillies into halves. Keep the salt, turmeric and chilly powder ready along with the coconut milk. Wash the curry leaves nicely.

Heat oil in a wide mouthed wok. Fry the sliced onion till translucent. Put in the spice paste. Saute well for 2 minutes. Add the salt, turmeric and chilli powder, mix well and stir for 1 minutes.

At this stage,  add I big cup water. Let the curry come into boil. Drain the marinade from the fish heads and add to the curry. Add the lady's fingers and the egg plant pieces too. Cover and let cook for 2 minutes.

Uncover and add the tomato pieces, slitted green chillies, strained tamarind pulp. Pour in the coconut milk. Add the rest of the curry leaves. Cover and cook for 3 minutes.

Switch off the gas stove, its done. Enjoy with piping hot steamed rice!


Friday 24 October 2014

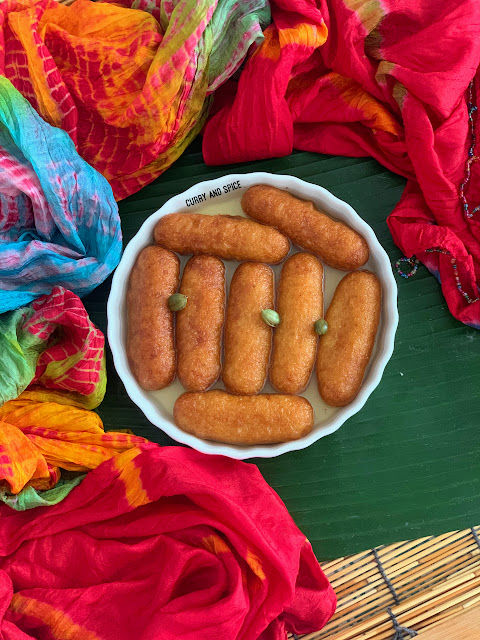
SEMOLINA MADE LANGCHA


Langcha....is a sweet we love way too much, specially if it is of Shaktigarh. To be precise, it originated in a small township named Shaktigarh, in the district of Burdwan. If you are travelling through that highway, you cannot help yourself but stopping by the shops and have few. Along the highway, there are series of frill free humble shops, by their looks you can't even imagine inside they have those brown-red, hot beauties ready to be served  for you.... please don't get scared of the flies around, they are part of the deal, hahaha. Those flies are decent you know, they keep on flying above your head without disturbing your plates. Still, morning to night, there are swarms of cars and buses stationed by these shops....from labourers to corporate honchos.

Well, I have a story to tell about this specific sweet Langcha! Sometime in 2004-2005, I do not remember exactly, my brother got a job at Reliance Mutual Fund, his first posting was at Durgapur! I and the man went to spend a weekend with bhai! I do not remember we took along with our toddler son or kept him with our mother! To travel from Kolkata to Durgapur by bus, you are to cross over Shaktigarh! The buses would stop both ways for some refreshments!On our way back, we ate hot kochuris, potato curry & these sweets! We got packed for us, the parent's home & the in-laws! We were to get down at Howrah & then take a cab to our home! Whilst getting down, we totally forgot about the sweet packs kept in the bunker of the bus! I am still sad about it, how I regret, about 500-600 rupees of sweets we bought, we got a good number at this amount then!

Anyway, I thought before My friends from the western world faint and cancel their trips to my country, I should post the recipe, so whoever wishes to can prepare at home. But you know I am proud when I say all these, in fact proud of the subcontinent.... we are poor, we are developing, but we have talents because we are fighters, since childhood we learn to fight against all odds, and we have a rich cultural heritage. I believe,  in a country, if its men are not proud of it and work towards bringing pride for their country, it eventually turns into a failed state. My version of langcha is more typical of the ones available at the Kolkata shops or may not be at all! I prepared it with semolina, actually it is made with paneer+mawa+refined flour may be! At Shaktigarh, they are darker,  deep fried in clarified butter and too sweet. I do not want my sweets to be too sugary!


INGREDIENTS : [for the syrup]

Sugar : 1 small tea cups [ adjust according to your taste ]
Water : 2 coffee mug
Green Cardamom : 3-4

INGREDIENTS :[for the Semolina Made Langcha]

Semolina : 1/2 coffee mug

Refined Flour : 2 tsp
Milk Powder : 2-3 tbsp
Ghee[clarified butter] : 1 tsp + 1 tsp +1 tbsp
Green Cardamom Powder : 1 tsp
Green Cardamom : 2-3
Baking Soda : 2 pinch
Oil : 100-150 ml for deep frying

METHOD :


Mix the milk powder with some water & keep aside. Make a powder of the semolina & lightly roast taken in a wok! Add the milk & 1tsp of sugar! Keep stirring with a hand beater, so there is no lump! Add some ghee & stir until it comes out from the sides! Transfer to a plate!

Once it is a bit cool, add the refined flour, green cardamom powder, the baking soda & some ghee! Prepare a smooth dough! Tear off portions & make into cylindrical shapes. But I could manage this!
 
Warm enough oil in a wok, do not make the oil hot! Slowly brown the uncooked dough pieces cooking in minimal heat! Take them out and place onto a tissue paper!

In another burner beside, make the sugar syrup by mixing the sugar, water and green cardamoms, let the mixture boil for about 13-14 minutes at medium to low heat. Switch off the gas stove! 

Gently add the fried stuffs! Let them be soaked for an hour. Serve warm or chilled.


Wednesday 22 October 2014

ROSHBORA


It is during this festive period, we prepare a series of sweets, just as we have a series of festivals....Navratri, Durga Puja, Dussehra, Diwali or Kali puja, Bhai Phota, until Poush Sankranti. This period is very auspicious for us, celebrating with lights all over and food, food, food....delectable, exotic, specially made, from starters to desserts. To be precise, Roshbora was precisely made in the months of December & January; as part of the Poush Sankranti ritual! It actually falls in the pithe category, not considered a sweet! In our home, it was made occasionally!

India having many states and our neighbours too, we are never in dearth of supply of recipes. You are saved from the boredom of repeating the same recipes years after years. With guests visiting, starting from Dussehra until Diwali.... we concentrate more on preparing a variety of sweets.... with simple easily available ingredients like Cottage Cheese, Lentils, Flour, Semolina, Besan, sugar, jaggery, milk and coconut. These few things can make mouthwatering sweets and desserts. Trust me readers, choose your ingredients & cook anything you are willing to! Like this Roshbora uses only split, skinless black gram lentils & sugar as the main ingredients!

I love this sweet because a favourite comic character of my childhood loved this... His name was 'Batul... The Great.... of Nonte Fonte fame. Bengali youngsters of the 70s and 80's can easily identify with these characters. We have grown up reading Batul, Teni da, Ghana da. They were written specially for the kids..... For this particular sweet called Roshbora, we will be using skinless  Urad Dal[black gram dal], sugar, water, a pinch of baking soda and fennel seeds. Cannot believe right? Then I would request you to explore through the recipe.


INGREDIENTS :

Urad Dal[skinless black gram dal] : 250 gm
Sugar : 150 gm
Fennel Seeds : 1 tsp
Green Cardamom : 3-4
Baking Soda : A pinch
Oil : 200 ml [for deep frying, the extra can be used later]

METHOD :

Wash and soak the dal overnight or in hot water for 2 hours. Put into a blender and make a smooth paste adding little water. Be very careful about using water for the paste because if you use bit more water, it will get very difficult to shape into balls.


After the paste is made, take it in a bowl & add the salt, beat for about 10-12 minutes! Check adding a little in a bowl of water, if it floats, it's ready! Add the fennel seeds and few drops of oil; beat well. Keep covered for 15-20 minutes!

In a deep bottomed vessel, add enough water, sugar, the green cardamoms! Bring to boil at low heat! In this recipe, the sugar syrup cannot get sticky but remain watery!


Add the baking soda to the lentil paste, beat a bit! Heat the oil in a pan, add gently small portions to the oil! Fry the balls in batches till golden brown. Take out & place onto tissue papers! Thereafter, add them to the boiling sugar syrup & boil for 5-6 minutes!

Transfer them to a bowl, cover with a lid! Allow the Roshboras / Lentil Dumplings in Sugar Syrup to soak for at least an hour or two. Enjoy warm or chilled.


Monday 20 October 2014

MAACH DORANGA / FISH IN DOUBLE SAUCE


Fish being an absolute favourite, I love experimenting with different recipes of fish. I keep on exploring throughout internet for some new recipes on fish. If I like one I do not take much time to grab the recipe and do it. Long back I saw a recipe in a magazine of fish in three types of sauce....red, green and white. I don't remember the recipe which I saw some 20-22 years back, so used a bit of my own idea and finalised on this recipe of fish cooked in two types of sauces. The very authentic Bengali fish recipe "koi hara-gauri" is also done in two types of spice sauces.


      I may not remember a particular recipe from the past, but if you stop by my recipes, you may see most of them are in some way related to my past or to my present situations and scenarios. Past and Present are interrelated.....so I never deny my past. Although I stop by a number of posts everyday to forget the past and live in the present, I feel I relive life reminiscing the olden days. May be they are words of wisdom but somehow I do not agree to it. If I forget my past I am denying so many things....me coming into being, growing up with siblings, my teachers, lovely friends. Believe me, diving into your past makes you feel into your parents arms....warm and cosy. Past was fun, happy, full of warmth and yes, pain....that of leaving behind and moving ahead for a new life... new people to meet. Pain is inevitable in a life's journey.... it helps you grow strong and understand life. There is nothing left in a blame game, life is only situations....supporting you or not. Accepting pain gracefully and moving on is an art of living we need to learn.


     Somebody knocked on my head and said I am a food blogger not a philosopher. Before people stop reading my recipes I need to switch on the damage control mode. Fish is  an important resource of protein for humankind... so why not. They have a role in culture through the ages, serving as deities, religious symbols, and as the subjects of art, books and movies. To simplify, its tasty, its healthy....so grab it and have it !!


INGREDIENT [ MAIN ] :

Grouper, Sea bass or any firm white fish : 500 gm
Salt : As per taste
Turmeric Powder : 1tsp
Vinegar : 2 tbsp
Oil : 4 tbsp

INGREDIENTS [ for the red sauce ] :

Ripe Tomatoes : 2 big
Onion : 1 big
Kashmiri Chilli Powder : 1 tsp
Ginger Paste : 2 tsp
Garlic Paste : 1/2 tsp
Coriander Powder : 1/2 tsp
Cumin Powder : 1/2 tsp
Salt : As per taste
Turmeric : 1/2 tsp
Cumin Seeds : 2 pinch

INGREDIENTS [ for the green sauce ] :

Coriander Leaves : 100 gm
Green Chilli Paste : 1 tsp
Salt : As per taste
Nigella Seeds : 2 pinches.

METHOD :

The fish has to be cut into ringlets, washed and marinated in vinegar for about an hour. After one hour, drain the excess vinegar water and marinate the fish with salt and turmeric. Keep aside.

Wash, cut and deseed the tomatoes and blend into a smooth paste. Slice the onion. Keep the ginger and garlic paste ready in hand. The cumin powder, coriander powder, salt and turmeric should be kept ready near you.

Wash, cut and blend the coriander leaves along with the green chillies smoothly.

Heat oil in a pan. Fry the fish pieces till golden brown. Transfer onto a serving plate. In the same oil, add the cumin seeds. As they splutter, add in the onion pieces and fry till golden brown.

Add the ginger garlic paste and fry till the raw smell goes. Add the tomato paste, sauté for 3 to 4 minutes, add the salt, turmeric powder, cumin and coriander powder. Stir well till the oil separates from the spice mix. Add 1 tea cup water. Cover and let boil for 5 minutes. Pour onto half of the fried fish pieces.

Heat 1 tbsp oil in a clean wok. Temper with nigella seeds. Add the coriander- green-chilli paste. Add little salt. Saute in low heat for about 3-4 minutes till the raw smell goes. Add 1/2 tea cup water. Let boil in medium heat for 3 minutes. As the gravy gets a creamy consistency, pour onto rest of the fried fish.

Let the fish pieces soak in the gravy. Warm again before serving with piping hot steamed rice.


Sunday 19 October 2014

MANGSHOR SHINGARA / MUTTON SAMOSA


Samosa or Shingara is an extremely popular tea-time snacks, to be precise evening tea-time. Though my memories give a different picture. In my humble place, early morning in all the sweetshops....one can see in big woks, those frying samosas.....oops they are as soothing as humans swimming in a pool of water during summer. I am not a poet, a big foodie....so could not think beyond this. To compliment these samosas there has to be the jalebis coated in sugar syrup, and slurp ..... is possibly the only sound that comes out wholeheartedly..... Saturdays and Sundays there would be a beeline in front of these shops. With a satisfied smile back home these would be finished in minutes with hot tea.

Our mother / parents seldom allowed us buy food from outside. She loved trying and doing it at home for us. I have picked up this habit from her and thank her for that. Preparing something with our own hands expresses our love and care for the people who mean to us. Again if you do not take interest in cooking does not make you care less for your family. I believe each one of us do it in one way or the other. I remember I first learnt making Chapatis and Puris after my son started going to school as I vowed I will never pack his lunch box with store bought things. My naughty witty husband reminds me often it is for son he gets to have home made chapatis in a foreign land forgetting its for him I learnt rest of the cooking. Jokes apart, he was the guinea pig for all my experimental cooking. Had he being little critical I would become a better cook.

 Back to track, our mother used to make shingara with fillings as per the season. Like in winters, she would make samosas with a cauliflower, potato and green peas fillings. In those days, cauliflowers and green peas tasted heavenly, grown without those strong fertilisers used nowadays. Being a strict non-vegeterian, I made a variation and prepared these minced mutton samosas which is common in our place, even at the Indian stores here in the island,we get it.. If you are not fond of mutton, you can use minced chicken. I actually tasted mangshor shingara first at the club canteen of the Gun & Shell Factory, our school was also a part of their educational venture.

An honest confession, my samosa cones are not as perfect as the store ones or like my cooking expert friends, but its not a compromise with the taste and its crispiness , that I can assure.


INGREDIENTS :[ for the filling ]

Minced Mutton : 400 gm
Potato : 1 big
Minced Garlic : 2 tbsp
Minced Ginger : 1 tbsp
Onion : 1 big
Minced Green Chilli : 1 tbsp [adjust as per your requirement]
Green Peas : 50 gm
Cumin Seeds : 1tsp
Coriander Seeds : 1 tsp
Dry Red Chilli : 2
Green Cardamom : 2
Cloves : 3
Cinnamon : 1 one  inch stick
Oil : 3 tbsp
Salt : As per taste
Turmeric Powder : 1 tsp

 INGREDIENTS : [ for the dough ]

Refined Flour : 2 coffee mugs
Salt : 1/4 tsp
Ghee[clarified butter] : 2 tbsp
Nigella Seeds : 1tsp[optional]
Water : 1 small cup.

INGREDIENTS : [for the mutton samosa]

The Filling
The Dough
Oil to deep fry

METHOD :

Take the flour in a wide mouthed vessel. Make a hole in the middle with your finger and put in the ghee and the salt. Add the nigella seeds.


Mix with the flour for about 2 minutes. Now add water little by little and make good use of your palm to turn into a smooth dough.


Cover the dough with a wet  cloth for about 1/2 an hour.


Wash the minced mutton through a strainer very well. Take in a bowl. Marinate with lemon juice, little salt and turmeric powder for about 1 hour. If you are using minced chicken, no need to marinate.  Dry roast the cumin seeds, dry red chillies, cardamoms, cinnamon, cloves and coriander seeds together and powder in a blender. Powder needs to be a little coarse. Wash, peel and cut the potato into small pieces. Thinly slice the onion and wash.

Heat oil in a wok. Add the minced garlic and ginger. Fry for 1 minute and now put the sliced onion and minced green chillies. After frying for 2 minutes, add the minced mutton along with the marinade. Stir well and cover. Lower the heat to minimum. After 10 minutes, open the cover and add the potato pieces, turmeric powder and salt as required. Cover again.  After 5 minutes add the green peas. Stir every 3 minutes to avoid burning from bottom. Do this till the mutton is about to dry.

At this level, use your ladle to mash the potato pieces. Add sugar and the dry roasted spice powder. Mix well and switch off. Transfer into a bowl and let it cool.


Now remove the cover from the dough. Use your palm once again over the dough which is a good exercise. Make balls and dust lighty with flour. Do the dusting only if it is required.


With a rolling pin make round shapes, little bigger than puris.  Cut half from the middle.


Shape into a cone. Put in filling carefully with a spoon.


Seal the edges nicely so that they do not open while frying.


Heat oil in a wok . Fry in batches. The wok should not be overcrowded with samosas. Whenever the wok is too heated up, keep the gas mark at medium to lower.


Once done transfer onto a double layer of tissue papers.


For the Coriander Chutney, blend some pre washed, freshly chopped coriander leaves, a clove of garlic, two green chillies together to a paste. Add little salt and lemon juice and serve.

As any other snacks, we will have it hot and fresh with our preferred chutney or sauce!


Saturday 18 October 2014

CHICKEN RENDANG CURRY


Rendang Curry is popular throughout South East Asia. It probably originated in Indonesia and later got adopted by Malaysia with a little of variation may be. Going by the wiki, Rendang is a spicy meat dish which originated from the Minangkabau ethnic group of Indonesia. Traditionally, it is prepared during the festive occasions by the Indonesians and Malays. Singapore, being a neighbour, Rendang is easily available and extremely popular.

There is a lot of Indian and Thai influences in Indonesian cooking we can see. Rendang, in general is a dry dish, simmered and slow cooked to perfection. I purposefully kept a little gravy in it. Use of kaffir lime leaves and lemongrass seems to be a Thai influence, whereas the use of turmeric, cumin, coriander is more of an Indian influence. Any country, big or small has influence of its neighbouring countries in its cuisine with a little of variation according to the availability of the ingredients. Thats what I feel, others may differ. 

Few would differ with me when I say Rendang Curry is exotic and flavourful . I prefer doing it with chicken and eggs. Whatever the gravy base be, if there is chicken or mutton; the son and the man would happily eat their meals! They love their share of meat & choice of fish!


INGREDIENTS :( for the spice paste)

Red Chillies : 8(adjust as per your taste)
Shallots(or small onions) : 10
Garlic : 6 cloves
Galangal(or ginger) : 1 thumb size piece
Coriander Seeds : 1 tsp
Cumin Seeds : 1 tsp
Dried red Chilli : 3
Candle nut : 20 gm
Fresh Nutmeg : 1/4

INGREDIENTS :(for the chicken curry)

Chicken :1 kg
Kaffir lime leaves : 4
Lemon grass : 2 stalks
Star anise : 1
Cloves : 3
Green Cardamom : 2
Sugar : 1 tsp
Salt : As per taste
Coconut Milk : 100 ml.
Tamarind Juice : 1/2 tea cup
Oil : 4 tbsp
Toasted Shredded Coconut : 2 tbsp

METHOD :

Wash the chicken and marinate with salt and turmeric . Keep standing for an hour. Soak the dry red chillies in warm water for at least 30 minutes before putting into blender. Peel and wash the shallots. Put all the ingredients for the spice paste into the blender and blend into a smooth paste. Cut small the lemon grass stalks making bruises in them.

Heat the oil in a wok, add the star anise, cloves, cardamoms . Stir till fragrant. Put in the spice paste. Keep stirring till the oil separates from the spice paste. Add the salt, stir well! Add the chicken pieces, fold in well & allow cooking covered at the minimal heat for 15-20 minutes, stirring in between!

Now add the coconut milk. Stir and let boil. Add the lemon grass pieces and the kaffir lime leaves. Keep stirring every 2-3 minutes! Once done, switch off the gas stove. Garnish with toasted coconut.

Serve it with steamed hot rice!


Wednesday 15 October 2014

PATISHAPTA (COCONUT FILLED CREPES)


These sweet, coconut filled crepes brings back a lot of memories. When I was 5-6 years old,  our mothers did not have gas ovens in their kitchens to enjoy little bit of comfort. Yet they were far more active and energetic than we are. All day long till night she would happily lock herself in the kitchen, sweating and conforming to our demands without a complain. These days I  feel very guilty when I remember how back from school and college I demanded exotic platters one after another without even thinking how difficult it was for her to work on a clay oven even on evenings. 

I remember, may be around 1984-85, our kitchen was for the first time shining with a a gas oven. Can I ever forget the glittering smile on my mother's face to get a faster medium of cooking? Never. I have always taken a pride to admit I come from a very middle class, humble background and I will never compromise with the middle class values taught by my parents. I firmly believe if I forget my roots, I reach nowhere. I may be going offtrack, this is what happens these days. The quite little girl who remained unnoticed most of the time, is talking too much, signs of aging you know.

The above lines are not irrelevant  altogether when I say these coconut filled crepes tasted best when prepared in clay ovens. It was a day long process....from soaking the rice....grinding it to flour...scraping the coconut, mixing it with right amount of jaggery. This was mainly prepared during winter season. Lets start with the recipe which is a tribute to all the elderly women in the family for whom I could dare to prepare it today.


INGREDIENTS :(for the filling)

Shredded Coconut : 300 gm
Jaggery : 100 gm
Camphor : 1small tablet or Green Cardamom Powder : 4 pinches.
Water : 1 coffee cup.

INGREDIENTS :(for the pancakes)

Refined Flour : 1 coffee mug
Semolina : 1/2 coffee mug
Rice Flour : 1/4 coffee mug
Sugar : 1/2 tea cup [I used brown sugar]
Oil : 2 tblsp
Water as required


METHOD:

In a wide mouthed big bowl, take the refined flour, rice flour, semolina, sugar. Mix well. Add water to that much quantity which makes the batter neither creamy, nor too running, but just in between. Add 1/2 tsp oil and mix well. Make sure there is no lump in the batter. Adding oil helps the crepes to come out well. Keep standing for 1 hour.

Put a wok atop the gas oven. Pour 1/2 small tea cup water. Add the jaggery. Let it melt. When it starts boiling keep stirring. As it becomes sticky, add the the shredded coconut and camphor tablet, alternatively the green cardamom powder. As the mixture gets sticky, switch of the gas oven. The filling is ready.

Heat a nonstick frying pan. Put 1/2 tsp oil. Once the oil is heated, wipe the pan lightly with a wet cotton cloth. Now pour in one laddle full of batter in the pan and immediately spread it in round shape with the help of the back of a ladle. When its almost done, add 2 tablespoon of coconut jaggery filling in the middle of the crepes. With the help of the spoon, spread it widthwise. Now fold in from both sides and place in a plate. Or you can just roll.

Please note, you need not add oil before making each one. You add oil once in every 3 crepes you prepare. I always use a non-stick frying pan to avoid it from getting stuck to the pan admitting I do not have the expertise of our moms and grand moms.

Enjoy warm or chilled!!


Tuesday 14 October 2014

BASIC HOMEMADE CUSTARD


DESSERTS are an integral part of a meal I feel. Why after meals, we can have it anytime of the day, let me tell you it tastes best at midnight. Truly, having desserts at midnight while watching TV is so comforting, I echoed my nocturnal husband. The best quick made dessert so far I feel is custard. If a working mother wants to store dessert on her refrigerator even on weekdays, nothing is easier than a custard. Keep it ready in hand, pour it over assorted fruits or cakes or even have it with a generous serving of dry fruits. You will love to see the happy faces around and go to sleep peacefully.

What I like about making a basic custard is that  we can make it anytime with ingredients already available at home. Here for you a no frill custard recipe with ingredients you already have in your pantry. Garnish with any fresh or dry fruits of your choice and enjoy!


INGREDIENTS :
Eggs : 4
Milk : 5 cups
Corn Flour : 1/2 cup
Sugar : 1/3 cup
Vanilla : 1 tbsp
I used chopped ripe Mango & Red Grape for garnish!


PROCEDURE :

In a pan, whisk the eggs,milk,vanilla and cornflour together. Keep whisking till the mixture turns smooth and there is no lump left.

Switch on the gas oven. Place the pan on the gas. Stir constantly, bringing to boil and simmer for 2 minutes.

Now add the sugar, stir till it melts and switch off the burner immediately. Please note, the sugar should always be added at the last to avoid the mixture from burning.

Garnish as you wish or pour over cakes...warm or chilled...............anyway its yummilicious!!


Sunday 12 October 2014

INDONESIAN FISH CURRY


I visited Bali in 2011 and loved its beaches, picturesque nature and offcourse; the local cuisine. Later, early this year, when I visited Bintan, my feelings got firmer. Fresh fish, meat and vegetables cooked with flavorful spice mix using coconut milk instead of water; wow, they tickled my taste buds.
My love for fish keeps me hunting for new recipes throughout the internet. So many countries, different culture, their cuisine; for me its like exploring the world. With each recipe I go through, I feel I learnt a bit about their culture. Each recipe I try is my way of paying tribute to that culture.

When I started this blog,  I thought of promoting the cuisine of my region only through it. Then I felt, a variety should also be welcomed. I love my city, region, language but at the same time I believe "the entire world is one big home." Our mind should be open enough to accept other culture, cuisine, their way of life; that is a kind of learning also. We should not limit ourselves to a particular region; whether it is it's language or culture or cuisine.

With this thought, I cooked and pen this INDONESIAN FISH CURRY in the blog.


INGREDIENTS :

Any white fish fillets/prawns : 300 gm
Coconut Milk : 200 ml
Onion : 1 big
Red Chilli : 2
Garlic cloves : 2
Shrimp Paste : 1 tsp {I skipped}
Coriander Powder ; 1 tsp
Turmeric Powder : 1/4 tsp
Red Chilli Powder : 1 tsp
Soya Sauce(light) : 2 tsp
Salt : As per taste
Lime : 1
Lemongrass : 1 stick
Sunflower Oil : 2 tbsp
Coriander leaves : 25 gm

METHOD :

Peel and finely chop the garlic. Peel and slice the onions. Cut the red chillies into halves, deseed and slice. Finely chop the lemongrass. Roughly chop the coriander leaves. Wash everything separately. Get the juice from the lemon.

Heat oil in a wide mouthed pan. Add the sliced onions and chillies. Saute for 2 minutes. Once the onions get translucent, add the garlic paste. Stir for a minute.

Now add the turmeric, lemongrass, salt, soya sauce, coriander powder, chilli powder to the pan. Saute for 2 minutes. Pour in the coconut milk and a cup of water. Bring it to a boil. Add the fish pieces carefully. Let boil for another 4 minutes. Add the chopped coriander leaves and the lime juice. Switch off the gas burner.

Please note, since you are using soya sauce and if in your case the shrimp paste, be very careful about the use of salt as they already have salt in them. You can garnish with chopped spring onions if you wish to.

Enjoy only with piping hot steamed rice!!


Saturday 11 October 2014

MUSHURIR DAL ER KHICHURI / MASOOR DAL KHICHDI / RICE & RED LENTIL HOTCH POTCH


Mushurir Dal er Khichuri / Masoor Dal Khichdi is a rice and lentil hotchpotch made of skinless red lentils with or without vegetables. It's a nutritious meal our son mostly grew up on. You get the right amount of carbohydrate, if adding vegetables then vitamins too. On a lazy Friday night, you are not really in the mood to indulge yourself in cooking any complicated dish. Friday evening is to plan for some exotic dishes to try out on the two most beautiful days of the week; Saturday and Sunday. You cannot leave yourself starving too. You are just  not in the mood to order anything from outside and upset your stomach, denying yourself  the exotic platter you are planning for the next two days. Then what to do? No thinking twice, treat yourself with a humble and simple plate of MUSHURIR DAL ER KHICHURI and relax sitting and watching a movie with your family.

In our childhood, our mothers cooked a rice & lentil hotchpotch only when it rained or when mom was sick. Well, to that I would say, we do not have that level of energy what they had.  They stayed at home and planned elaborate meals for the family, specially if that family had a foodie kid like me. An honest confession; I live to eat. Modern women have to multitask; life is faster, complicated and khichuri / rice & lentil hotchpotch is handy. Live alone rain, we can have it every now and then. 

We usually cook khichuri / rice & lentil hotchpotch with Moong Dal. But just as we need variation in life, we definitely need variation in our food too. Otherwise, life gets boring and our taste buds; dull. I quite like to try out new recipes. I remember our mother cooking a red lentil & parboiled rice hotchpotch with or without potatoes! A hotchpotch with red lentils was not regularly made, she cooked using onion & green chilli as per the instructions from the maternal grandfather who loved it! He would now & then bring instances from his past days in Bangladesh; then East Pakistan, what he ate & when, he could instruct about various recipes! He lived with us for the few years he was posted in Kolkata until his retirement in 1984-85! 

Our mother served it with  potato fry and an omelette. Mommy dear never divulge the secret spices she uses for her recipes, not even to her daughter. So the poor daughter came up with her own version of MASOOR DAL KHICHDI / MUSHURIR DAL ER KHICHURI. I however believe she did not use any spice powder except for the turmeric powder in this recipe! In our case, we need to add some ghee whilst having this meal!


INGREDIENTS :

Rice(par-boiled) : 1/2 coffee mug
Masoor Dal (skinless red lentils) : 1/2 coffee mug
Sliced Onion : 1 coffee mug
Dry Red Chilli : 2 Halved
Slitted Green Chilli : 3-4
Bay leaf : 1
Cumin Seeds : 1/4 tsp
Salt : As per taste
Turmeric Powder : 1/2 tsp
Sugar : 1 tsp [optional]
Oil (preferably Mustard) : 3 tbsp

PROCEDURE :

Take the rice and dal in a big bowl. Wash a few times! Take the washed rice, dal in a heavy bottomed vessel. Add enough water, salt and turmeric and put for boil, keep the heat at low. We are to give a stir every few minutes! 

After some 9-10 minutes, add the washed & slitted green chillies, keep cooking until done! Switch off the gas stove & add the sugar, if using! Give a stir!

Arrange all the spices at your cooking table. Tear the dry red chillies into 2 halves. Heat the oil in a clean wok & temper with the cumin seeds, dry red chillies and a bay leaf. Add the sliced onions and fry until brown. 

At this stage, add the cooked rice and dal mix. Stir and mix well for about 3 minutes. Adjust the sugar if required, stir and switch off. the final product shall be of running consistency but should not taste like dal & rice!  

We should not cook it with basmati rice but I had to! Towards the end, I used a masher lightly to get a sticky consistency! Try to cook it with ronni, soda maser or other parboiled rice grain varieties! You can serve it with any kind of fries, we usually have with potato fry & scrambled eggs.